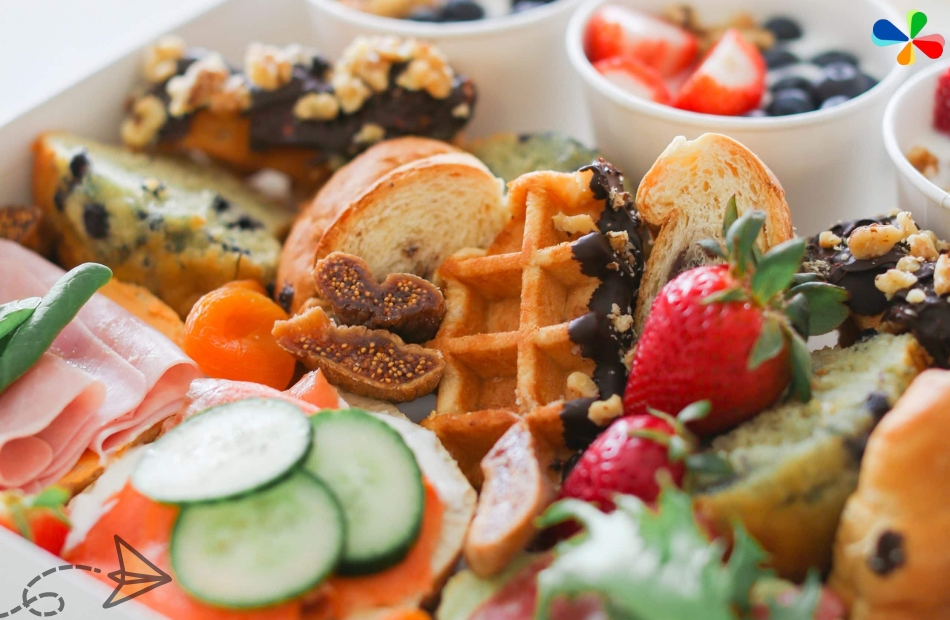
A picnic charcuterie board offers a creative and fun way to bring together an assortment of delightful, bite-sized snacks. Perfect for any outdoor occasion, this board is a versatile, easy-to-make option for both casual and more formal picnics. The beauty of a charcuterie board lies in its customization, allowing you to include a variety of treats that cater to different tastes, preferences, and dietary restrictions.
From fresh fruits and crunchy vegetables to creamy cheeses and flavorful meats, this picnic charcuterie board serves as a visual feast and an edible one too. Whether you’re planning a relaxing day in the park or a festive summer gathering, this board can be tailored to fit your needs. Let’s dive into creating the perfect picnic charcuterie board that’s sure to wow your guests.
What is a Picnic Charcuterie Board?
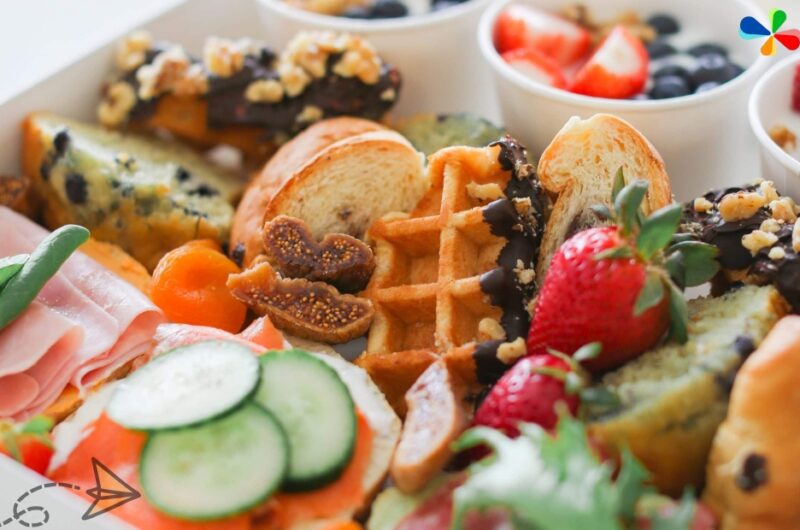
A picnic charcuterie board is an assortment of various appetizers, snacks, fruits, and cheeses, arranged artistically on a large platter or board. Unlike traditional charcuterie, which focuses on meats, this version includes a broader variety of foods like fresh vegetables, fruits, dips, and other finger foods. Charcuterie boards are designed to be visually appealing and provide a variety of textures and flavors that make them perfect for sharing. The key is balancing sweetness, saltiness, tanginess, and crunch.
Helpful Kitchen Tools
Creating a well-organized and attractive picnic charcuterie board requires just a few essential kitchen tools to get started:
- Large Wooden or Plastic Board: A sturdy, non-slip base to display the ingredients. Opt for one with raised edges for easy handling.
- Sharp Knife: To neatly slice fruits, vegetables, and cheeses. A cheese knife is helpful for soft cheeses.
- Toothpicks or Skewers: These are useful for threading fruits, cheese cubes, and other small items.
- Bowls: Small bowls are needed to hold dips, nuts, or olives to keep the ingredients from mixing.
- Cheese Plane: This tool helps create thin slices of cheese that look elegant on the board.
Key Ingredients for a Picnic Charcuterie Board
When selecting ingredients for your picnic charcuterie board, aim for a mix of colors, textures, and flavors. Here’s a breakdown of the essential ingredients:
- Cheeses:
- Soft Cheeses: Brie, Camembert, or cream cheese
- Hard Cheeses: Aged cheddar, Gouda, or Manchego
- Blue Cheese: For those who enjoy strong, tangy flavors
- Meats (Optional):
- Sliced Prosciutto or Salami
- Chorizo or Pepperoni for a bit of spice
- Fruits:
- Fresh Fruits: Grapes, strawberries, blueberries, melon slices, figs
- Dried Fruits: Apricots, raisins, or cranberries
- Vegetables:
- Cucumber Slices: Adds freshness and crunch
- Cherry Tomatoes: Bright pops of color
- Olives: For a salty bite
- Crackers and Breads:
- Crusty Bread: Baguette slices or focaccia
- Crackers: Choose a variety, including whole-grain and water crackers
- Dips and Spreads:
- Hummus: A creamy base for dipping
- Pesto or Tapenade: For added flavor complexity
- Honey: For a sweet contrast to the salty cheeses and meats
- Nuts:
- Almonds or Walnuts: A satisfying crunchy addition
- Pistachios: For a unique and fun texture
How to Make a Picnic Charcuterie Board
Assembling a picnic charcuterie board is a creative and enjoyable process that lets you showcase your chosen ingredients. Here’s a step-by-step guide to help you create the perfect board:
- Choose Your Board:
- Start by selecting the right-sized board for your guests. A medium to large board works best for larger groups, while a smaller board can be used for more intimate picnics.
- Arrange the Dips:
- Place your dips (such as hummus, pesto, or tapenade) in small bowls on the board. Ensure they are spaced out evenly to make access easy for everyone.
- Layer the Meats and Cheeses:
- Create little clusters of meats and cheeses. Fold the slices of prosciutto or salami to add texture. For cheeses, cut them into wedges, cubes, or slices, depending on their type.
- Add Fruits and Vegetables:
- Fill the gaps between meats and cheeses with fresh fruits like grapes, strawberries, and melon. Add cucumber slices, cherry tomatoes, and olives for a refreshing touch.
- Incorporate Crackers and Breads:
- Arrange crackers and sliced bread along the edges of the board. This will not only help fill up the space but also offer a great base for pairing with cheeses and dips.
- Finish with Nuts and Extras:
- Place small handfuls of almonds, pistachios, or walnuts on the board to add a crunchy element. You can also add a drizzle of honey over the cheeses for an extra touch of sweetness.
Recipe Tips
- Seasonal Touch: Choose seasonal fruits and vegetables for the freshest flavors.
- Balance Flavors: Ensure there’s a balance between sweet, salty, and savory elements to keep the board exciting and diverse.
- Presentation: Play with the arrangement—make it visually appealing by alternating colors and textures.
- Personalize It: Customize your board by swapping ingredients to match dietary restrictions, such as gluten-free crackers or dairy-free cheese.
Storage and Reheating
Charcuterie boards are meant to be served fresh, but you can prepare many of the ingredients in advance:
- Assemble in Advance: Arrange the cheeses, meats, fruits, and veggies, and store them covered in the fridge. Add the crackers and bread just before serving to keep them crisp.
- Refrigeration: If you’re not serving the board immediately, refrigerate all components separately, and assemble the board just before your picnic.
- Keep Cold: For picnics or outdoor gatherings, pack the board with ice packs to keep items like cheeses, meats, and dips cool.
A picnic charcuterie board is not just a feast for the taste buds but also a visual masterpiece that brings everyone together. With its variety of ingredients, it offers something for everyone, making it the ideal choice for any outdoor event. Whether you’re celebrating summer, enjoying a casual day in the park, or hosting a picnic, this board promises to be the highlight of your meal.
By focusing on fresh, seasonal ingredients and a balanced array of flavors, you can create a picnic charcuterie board that’s as delightful to look at as it is to eat. Plus, its flexibility and customization options make it a timeless dish that can be adapted to suit any occasion or preference.
Picnic Charcuterie Board
Course: Appetizers, SnacksCuisine: AmericanDifficulty: Easy4
servings20
minutes275
kcalNo-cook, Assembly
18g
per serving20
minutesA colorful, customizable charcuterie board perfect for outdoor picnics. Packed with fresh flavors and textures everyone will enjoy.
Ingredients
1 wedge Brie cheese
1 cup cubed cheddar cheese
1 cup red or green grapes
1/2 cup strawberries, halved
1/2 cup cucumber slices
1/2 cup cherry tomatoes
1/4 cup olives
1/4 cup dried apricots
1/4 cup almonds or pistachios
6 slices prosciutto or salami (optional)
1/2 cup hummus or pesto
1 tbsp honey (optional)
1 cup assorted crackers
4–6 slices baguette or focaccia
Directions
- Choose a large, flat board or tray.
- Place small bowls on the board and fill with dips, olives, or spreads.
- Arrange cheese and meats around the bowls.
- Fill gaps with fresh fruits, veggies, and dried fruits.
- Add crackers and bread along the edges or in neat stacks.
- Sprinkle nuts and drizzle honey if using.
- Serve immediately or chill briefly before your picnic.
Notes
- Customize based on what’s in season and your guests’ dietary needs.
- Keep chilled until ready to serve—especially in warm weather.
- Avoid overly messy or runny items that can spill in transport.